
Slow & Low Dry Rub Oven Chicken
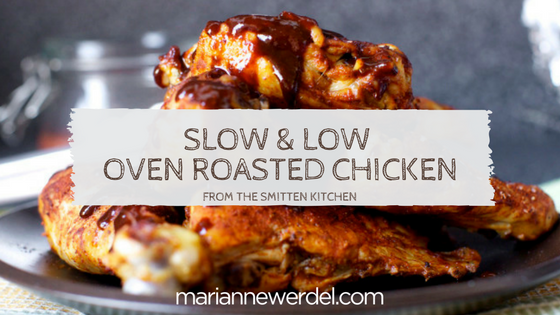
I love this Slow and Low Dry Rub Chicken recipe from The Smitten Kitchen website. This recipe never fails to please big groups of adults or kids (especially starving teenage boys). I am forever grateful for the BBQ gurus in my life, but I prefer not to deal with coals, smoker chips and finicky temperatures for hours on end. I celebrate hands off, foil wrapped, dry rubbed chicken for 2-3 hours, (with little cleanup, I might add) and be done with it.
This recipe is just as easy to do 4-5 pieces of chicken for a family dinner or a couple of chickens for a group feast. Brining your chicken first is a must, for the juiciest chicken you ever thought possible. The dry rub is my go-to these days for chicken and ribs. You’ll have a bit more than you need (it makes one heaping cup), but then you get to have some on hand for the next dry rub meal.
The recipe looks long and complicated, but it is actually 3 easy steps. Brine, rub and cook. Then, enjoy with a simple salad, slaw or roasted potatoes.
Ingredients:
Brine
- 4 cups water
- 1/3 cup Kosher salt
- 1/3 cup white or brown sugar
- 1/3 cup white vinegar
Dry Rub
- 6 tablespoons packed dark brown sugar
- 4 tablespoons sweet or smoked paprika
- 3 tablespoons chili powder
- Up to 1 tablespoon ground red pepper (if you like things quite hot) or to taste (I used 1/2 teaspoon)
- 2 teaspoons garlic powder
- 1 teaspoon ground cumin
- 1/2 teaspoon ground nutmeg
- 2 tablespoons Kosher salt
- Up to 1 tablespoon coarsely ground black pepper
Chicken
- Up to 5 1/2 to 6 pounds mixed bone-in skin-on chicken parts
Directions:
Brine the chicken:
- In a large plastic container, mix water, salt, sugar, and vinegar. Add chicken parts and cover with a lid or plastic wrap in the fridge, for at least 1 hour and up to 6.

Make the rub:
- Mix ingredients. You will have extra for future use
Prepare and cook the chicken:
- Heat oven to 300 degrees.
- Remove chicken parts from brine and pat dry.
- Place pieces of chicken on two very large pieces of foil, large enough to fold over chicken and form packets. Pat chicken pieces generously on all sides with rub; do not be shy about using more than you expect.
 Turn the chicken pieces, so their meatier sides are down, and tightly fold the foil around them to make two large packets.
- Place two cooling racks (which will act as baking racks) on two baking sheets (one on each). Place a chicken packet on each and place one sheet on an upper oven rack and one on a lower.
- Bake chicken for 1 hour, then rotate baking sheets. Bake for another 30 to 60 minutes, until the internal temperature of the thickest part of each chicken reads 155 degrees. (Chicken is done at 160. This leaves you a little heat window for the next step, without leading to overcooking. If you’d like to skip this, just cook the chicken in foil until it reaches 160.)
Finish the chicken:
- Heat broiler. *Carefully open each packet of chicken and pour accumulated juices into a saucepan. Arrange chicken pieces on open foil packets and run each tray under the broiler until lightly crisped at edges and cooked through. Place on serving platter.
*Option to use your pan drippings to make your own BBQ sauce. It is a bit too salty for me with the dry rub, and we aren’t a big BBQ sauce household.
Related Posts

Our July 4th BBQ Menu
For our Meaningful Meals in this issue of #Get a Grip newsletter, I want to…
September 22, 2018
Easy Pesto
One of my kitchen staples that I always have on hand in my refrigerator is…
September 22, 2018